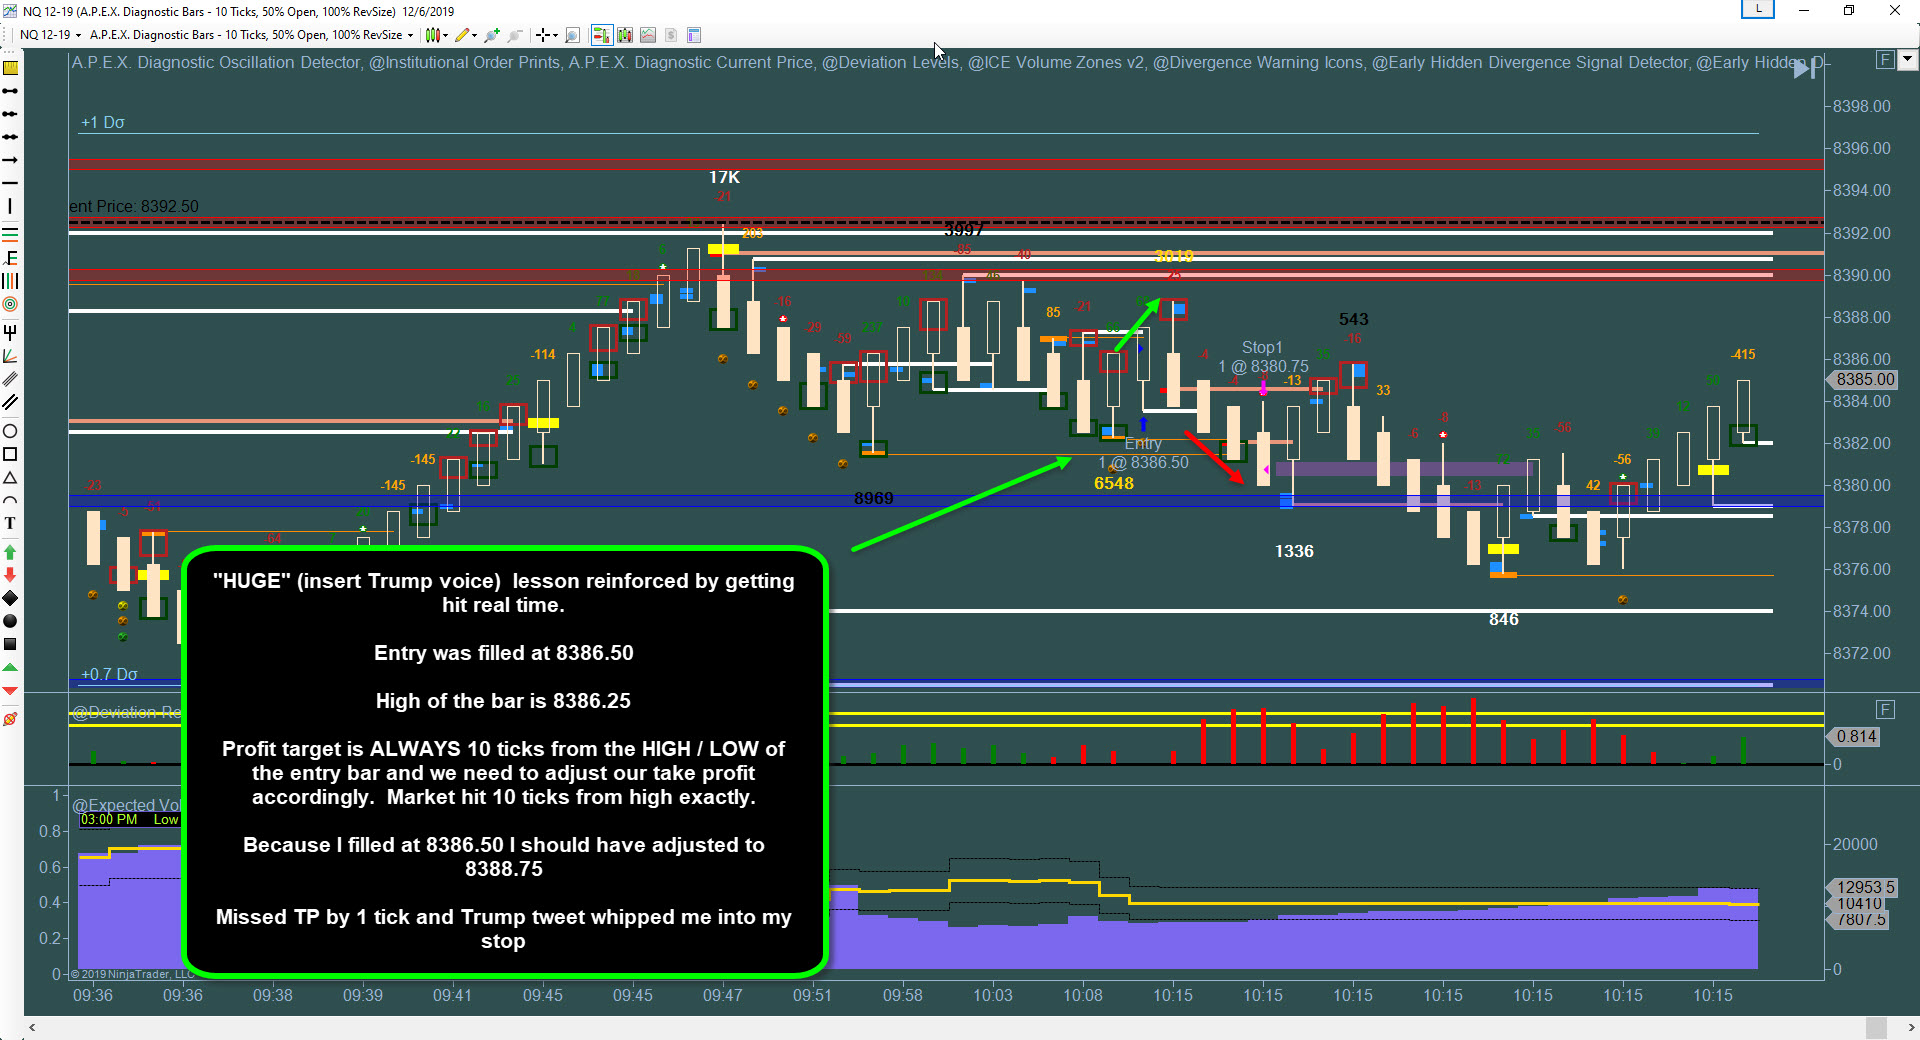
Today I learned a “HUGE” lesson (insert Trump voice) LOL
I have heard Darrell say it over and over but for some reason it did not register in my stubborn brain.
“Your take profit should be set 10 ticks from the HIGH / LOW of your entry bar”.
The importance of this little phrase was reinforced today for not only myself but many other people in the room today.
The scenario was that we got at Setup 2 entry a trapped xbox long with a paw print to boot and I entered like I normally do. One tick above the high and my ATM set my take profit 10 ticks from my fill. Then the tweet happened and boom, market jumped 10 ticks from the high and whipped down and stopped me out.
The Orange man sent one of his tweets and increased volatility instantly. USE THOSE ATMS WITH STOPS. Mine minimized the damage like its supposed to.
Darrell took profit, as did all the other peeps that have the ability to listen, LOL. What was the difference? What Darrell has been telling us all along.
Regardless of your fill price the take profit should be adjusted to 10 ticks from the HIGH / LOW of the entry bar.
In this instance the HIGH of of the bar (Long entry) was 8386.25 and 10 ticks from that was 8388.75. Because I filled at 8386.50 my take profit was set at 8389. I should have adjusted to 8388.75. Lesson learned. The Hard way. LOL
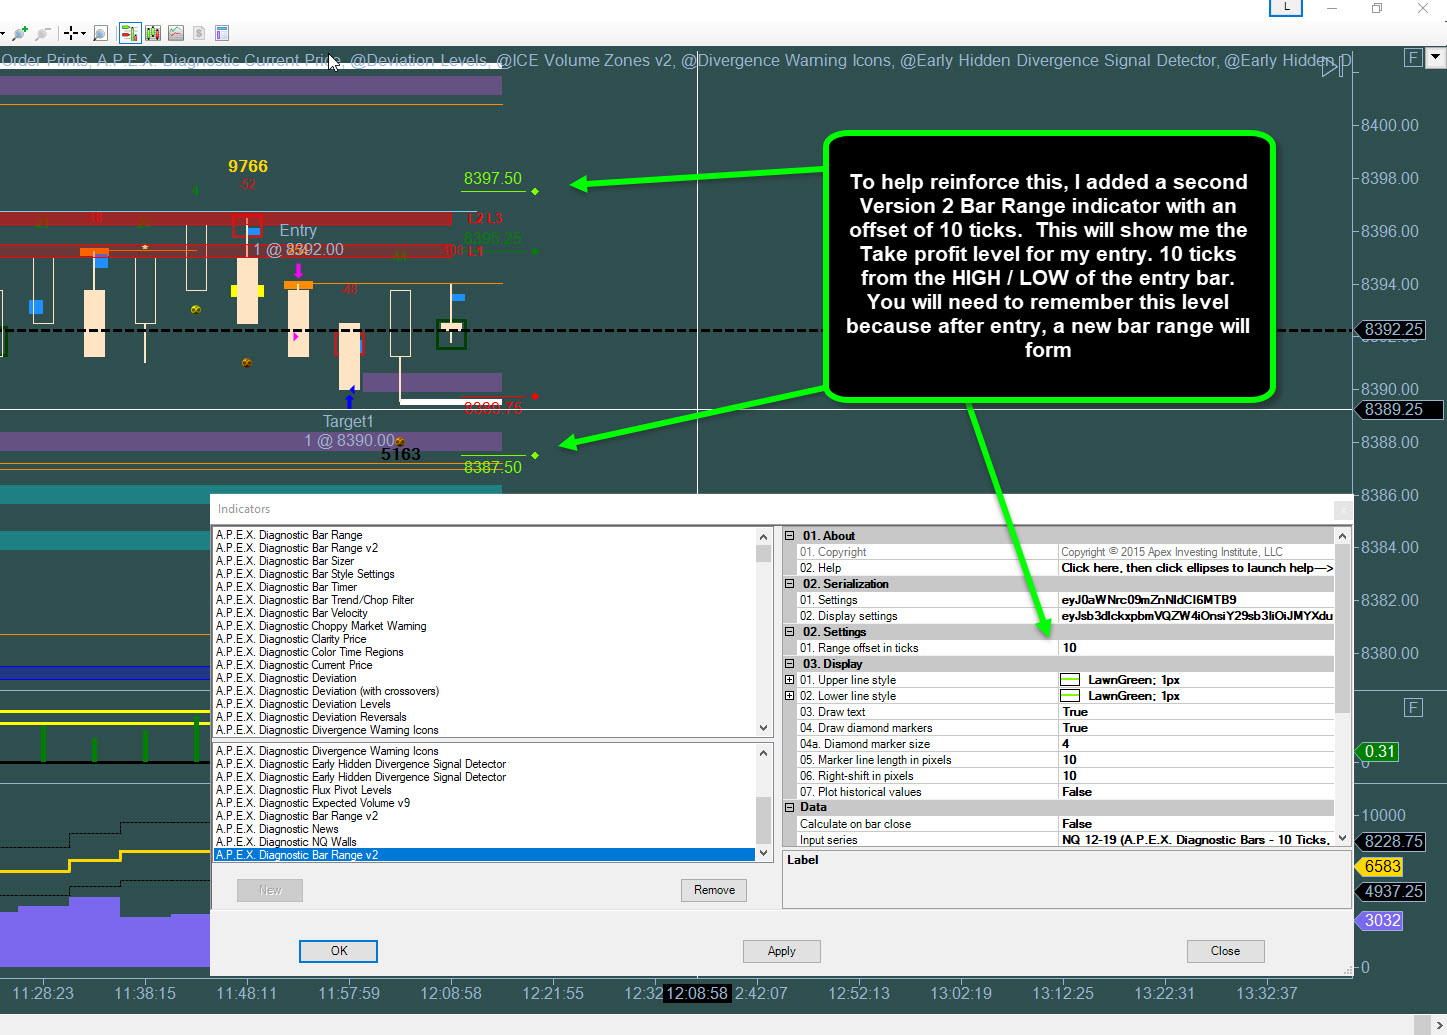
One tip I decided to implement was the addition of a second version 2 Bar Range indicator with a 10 tick offset. This will visually show me where the 10 tick take profit is located from the entry bar. Remember those levels because once you enter on the new bar the bar range indicator will show new levels. you will see what I mean when you try it out.
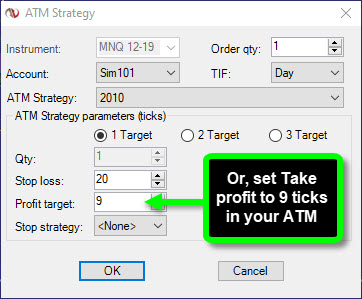
Another option would be to simply set our ATM’s to take profit at 9 ticks. HOWEVER, you need to check your fill price and adjust accordingly. Sometimes your fill can be worse than one tick away from the high or low, or in Darrell’s case he got filled better and was able to adjust his take profit to improve his chances of hitting 10 ticks. I believe he filled right on the high and his take profit was at 8388.50, one tick inside the high of the take profit bar.
Overall a great lesson and another successful trading day. I ended the day 4 for 5 trades and one very valuable lesson. See you next week!
-Christopher