FOR THE STEP BY STEP ORDER PRINTS TRAINING COURSE VIDEOS CLICK HERE
Apex Order Prints (OP) is used in conjunction with other Apex Indicators and systems as an extra confirmation on entries and possible additional / extra entries. Order prints is an indicator and is not a NOT a system or meant to be a stand alone product. Order Prints confirmation is NOT required to take an entry on the core Apex Systems. Follow the actual system rules and only use OP as extra confirmation as you choose to. For example, when trading SEES and using OP to confirm entries, you are trading SEES, not OP. Follow the SEES rules and use OP for extra confirmation, additional entries, and deeper insight to managing the trade, as well as trailing and tightening stops.
When using the Directional Bias Features of OP, all directional bias features are not required to show up on one bar. Sometimes one feature will show up, sometimes all will show up. A solid confirmation consists of at least 3 or 4 features showing up on one bar.
Several directional bias features may show up on one bar with conflicting indications. If you have only one conflicting signal but the bar has Leading Volume, the Leading Volume can override that one opposing signal. If there are two or more opposing signals the confirmation is invalid.
All aspects of the Directional bias features can be taken into account. The strongest ones to keep an eye out for are:
Total Volume Acceleration ( Lightning bolts on top level numbers at top of the bar )
Net Volume Acceleration ( Lightening Bolts on second set of numbers on top of the bar )
Leading Volume ( Blue shaded cells within the bar )
Momentum ( Star printed at top of bar red or green )
Absorption ( An"X" painted at top of bar red or green )
It is best if the bar have at least 3-4 confirming indications and that at least two of them be from the list above. There are many variations as to how to use OP and take all factors into account including Directional Bias and Trade Management Features all together. So test OP in demo along side of the existing systems you trade with all the default settings to see which features and confirmations best fit your trading. Once you have a handle on reading everything and what you want to use, you can customize your chart exactly how you want it to cut down on clutter.
PUTTING IT ALL TOGETHER:
Simpifying Order Prints

Deviations and Ice

Using OP with Apex Systems:
IZSS:
NOTE Apex Order Prints works on Diagnostic Bars, Continuum / Shadow Bars, and on Time Based Bars. The following examples are all based on Diagnostic Bars, even as an IZSS confirmation. Test the various bar types and bar settings to see which works the best for your particular trading style and strategy. These are examples.


Another IZSS Entry


IZSS Swing Trade


SEES:
SEES Swing Trade


SEES Power Play


SEES Elevator

Non Confirmed Elevator

SEES Sling Trade


SEES and Elite MVP - Apex Pattern “E”


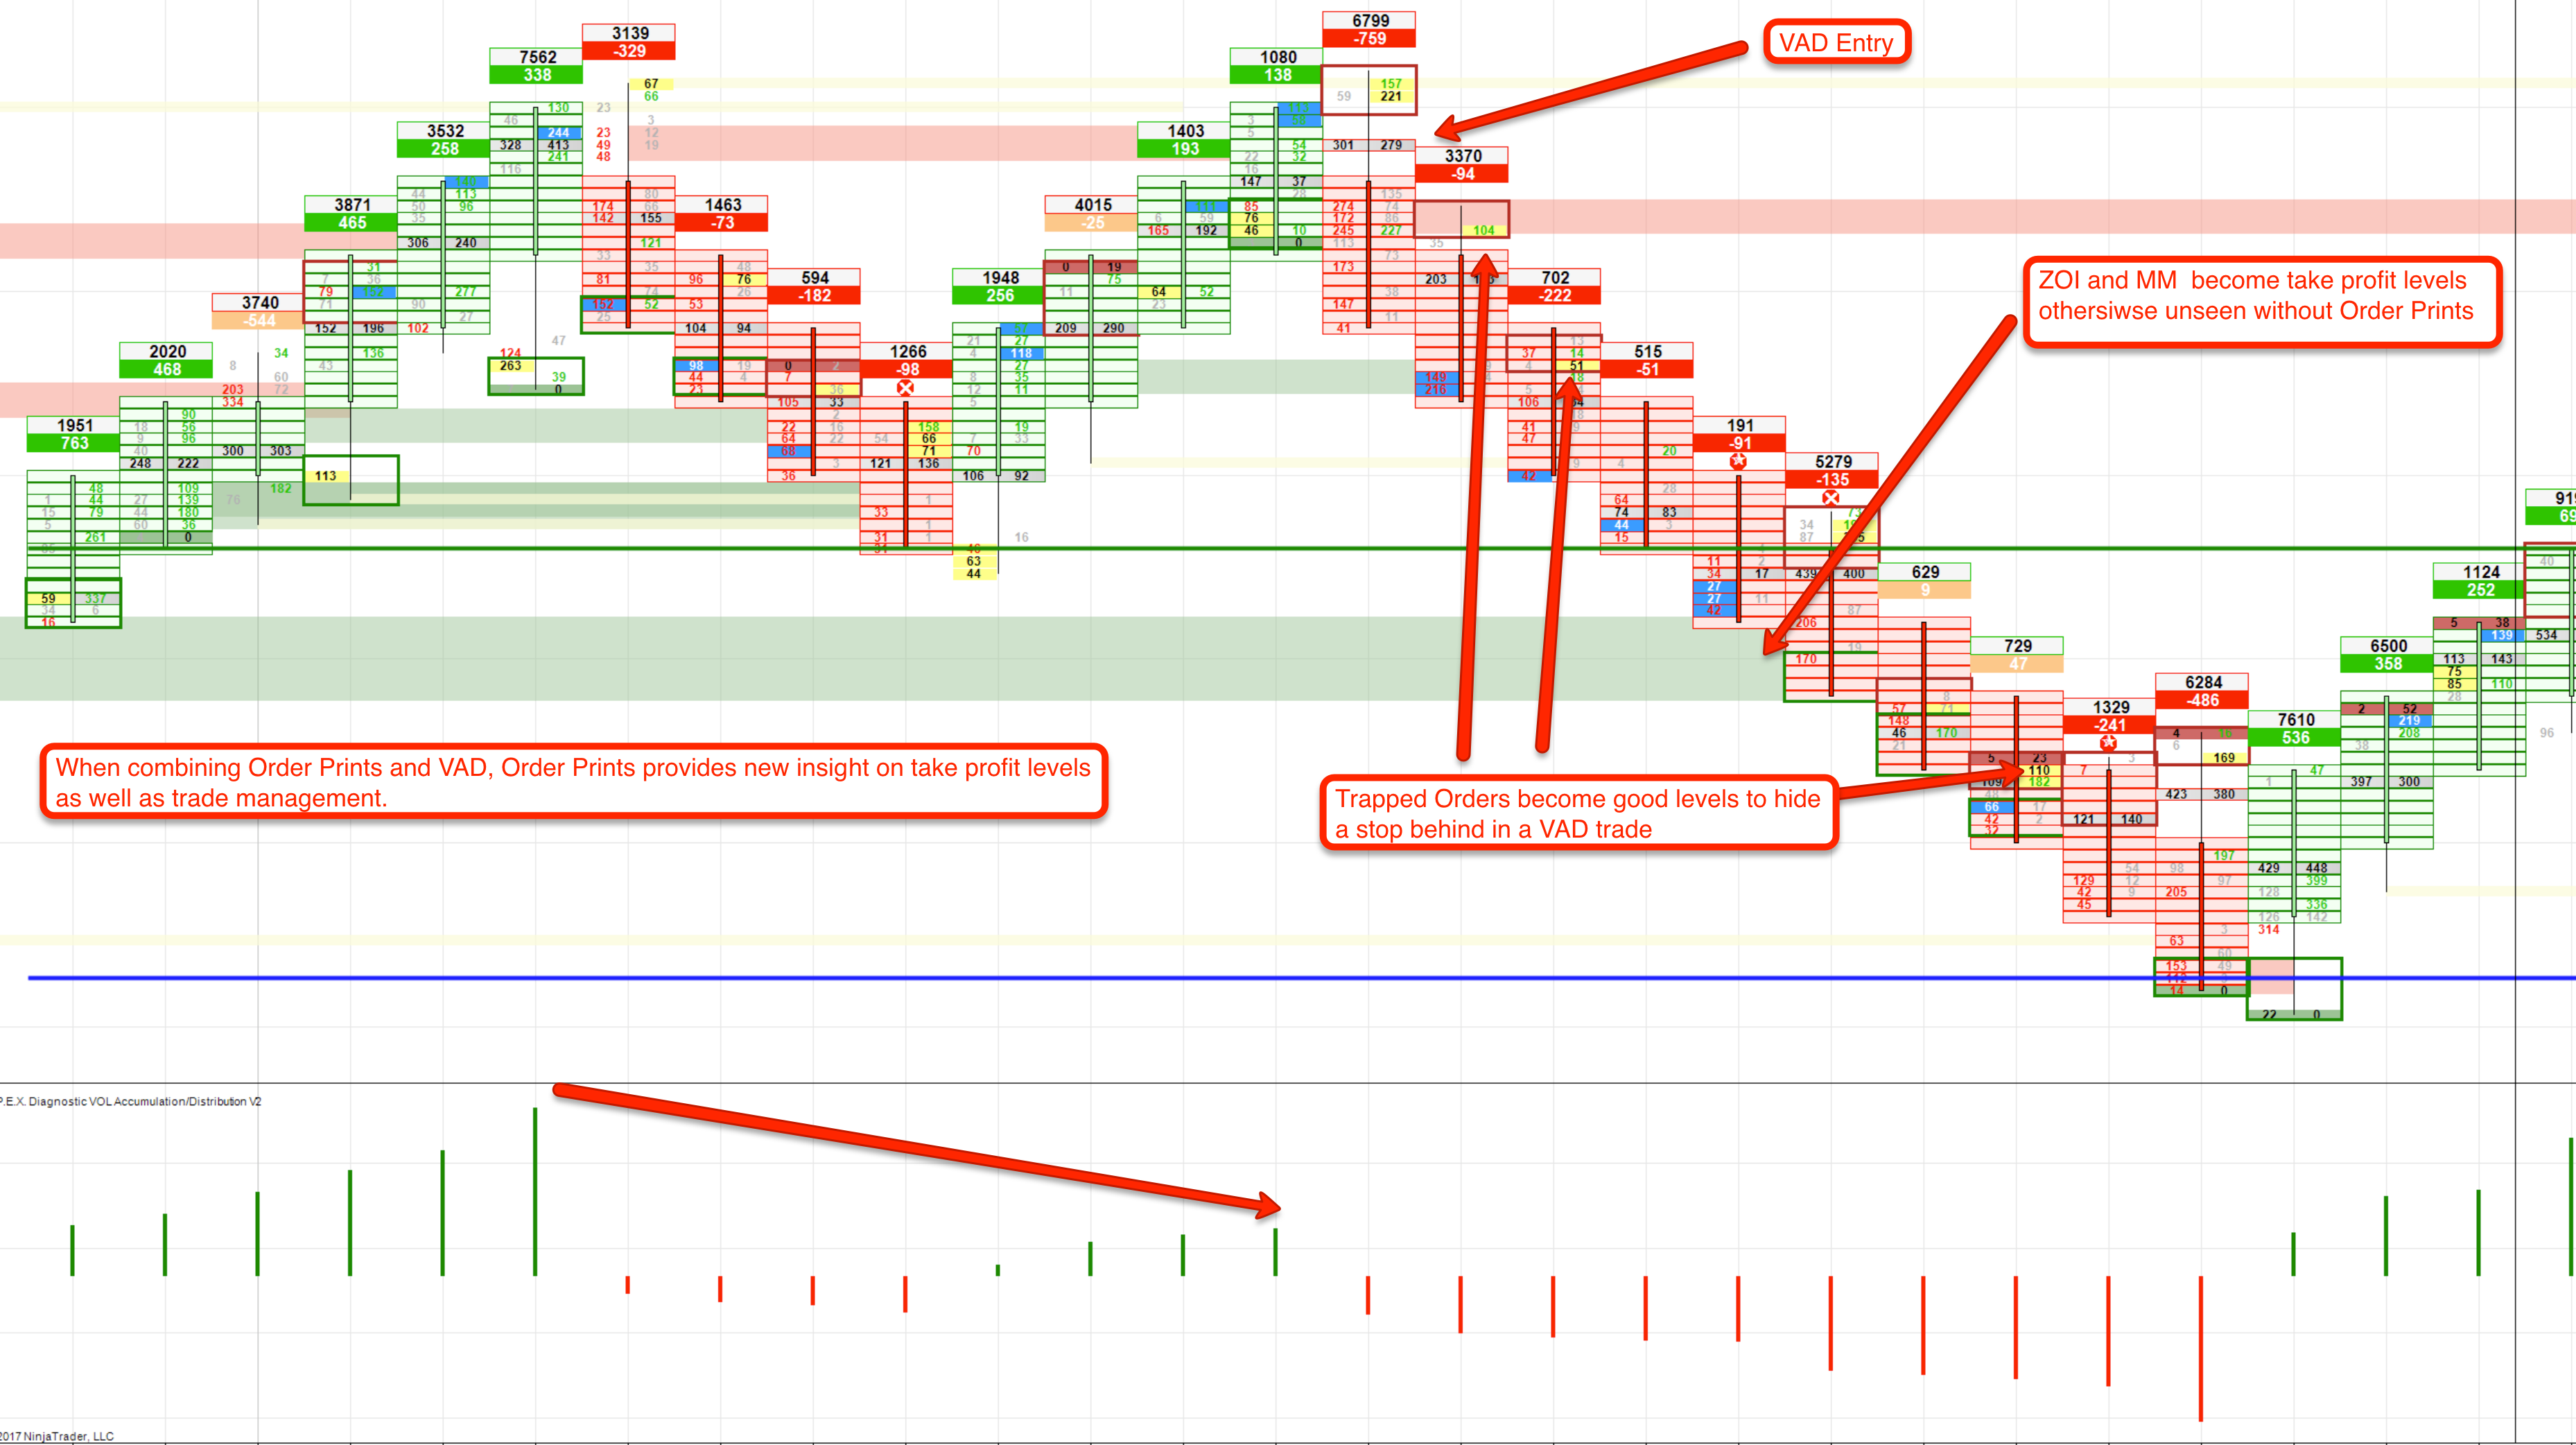
VAD and VAD 2.0


**_
General Info Regarding Strong Levels, Trade Management, and General OP Overviews:
_**


Click HERE to share your findings, strategies, charts, and OP trading discussion